Single Shot MultiBox Detector (SSD) on Jetson TX2
2019-05-16 update: I just added the Installing and Testing SSD Caffe on Jetson Nano post. If you are testing SSD/caffe on a Jetson Nano, or on a Jetson TX2 / AGX Xavier with JetPack-4.2, do check out the new post.
Single Shot MultiBox Detector (SSD) is probably the fatest deep-learning-based object detection model today. I tested it on Jetson TX2. It did seem to live up to the claim and perform well on the NVIDIA embedded GPU platform.
To gain an understanding about how SSD works, you can refer to the paper and the GitHub code share by the original author.
- “SSD: Single Shot MultiBox Detector”
- weiliu89’s caffe implementation of SSD: https://github.com/weiliu89/caffe/tree/ssd
Here’s how I installed and tested SSD on Jetson TX2.
Prerequisite:
Note that I’ve run SSD on Jetson TX2 with python2 so the descriptions below are all towards python2. It looks like the SSD code on GitHub should also work for python3. And I think it is easy to adjust the steps below to use python3.
- Build and install opencv-3.4.0, and make sure its python2 bindings are working properly. You can reference my How to Install OpenCV (3.4.0) on Jetson TX2 post.
- Install all dependencies required for Caffe. You can refer to my How to Install Caffe and PyCaffe on Jetson TX2 post for details. Just replace all
pip3withpip, andpyhton3withpyhton.
Building the Code:
-
Check out the code from GitHub.
$ cd ~/project $ git clone https://github.com/weiliu89/caffe.git ssd-caffe $ cd ssd-caffe $ git checkout ssd $ cp Makefile.config.example Makefile.config ### Set TX2 to max performance mode $ sudo nvpmodel -m 0 $ sudo ~/jetson_clocks.sh -
Modify Makefile.config as below. Or you could reference my modified Makefile.config.
- Set
USE_CUDNN := 1 - Set
OPENCV_VERSION := 3 - Add
compute_62(for TX2) andcompute_53(for TX1) intoCUDA_ARCH - Replace python2.7 numpy include path with
/usr/local/lib/.....(since I usedpip install numpyto install the latest version of numpy) - Set
WITH_PYTHON_LAYER := 1 - Add
/usr/include/hdf5/serialintoINCLUDE_DIRS - Add
/usr/lib/aarch64-linux-gnuand/usr/lib/aarch64-linux-gnu/hdf5/serialintoLIBRARY_DIRS
- Set
-
Build and test Caffe.
$ make -j4 all pycaffe
### Testing is optional
$ make -j4 test
$ make runtest
Testing:
In order to do testing, you’ll first need to downloaded the pre-trained caffemodel (weights).
-
Download the pre-trained “SSD300” caffe model from Google Drive: https://drive.google.com/uc?id=0BzKzrI_SkD1_WVVTSmQxU0dVRzA&export=download. Then decompress it.
$ cd ~/project/ssd-caffe $ tar xzvf ~/Downloads/models_VGGNet_VOC0712_SSD_300x300.tar.gz -
To test the SSD model with a video file as input, you just need to execute the following command. The displayed frame rate was around 8~8.5 fps when I tested it on my Jetson TX2.
$ PYTHONPATH=/home/nvidia/project/ssd-caffe/python python ./examples/ssd/ssd_pascal_video.py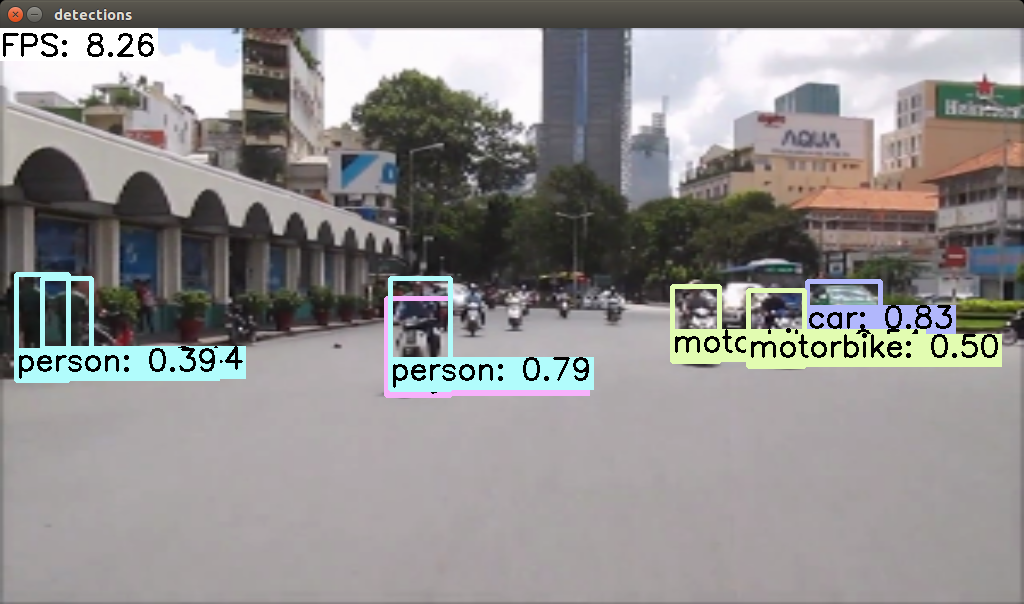
-
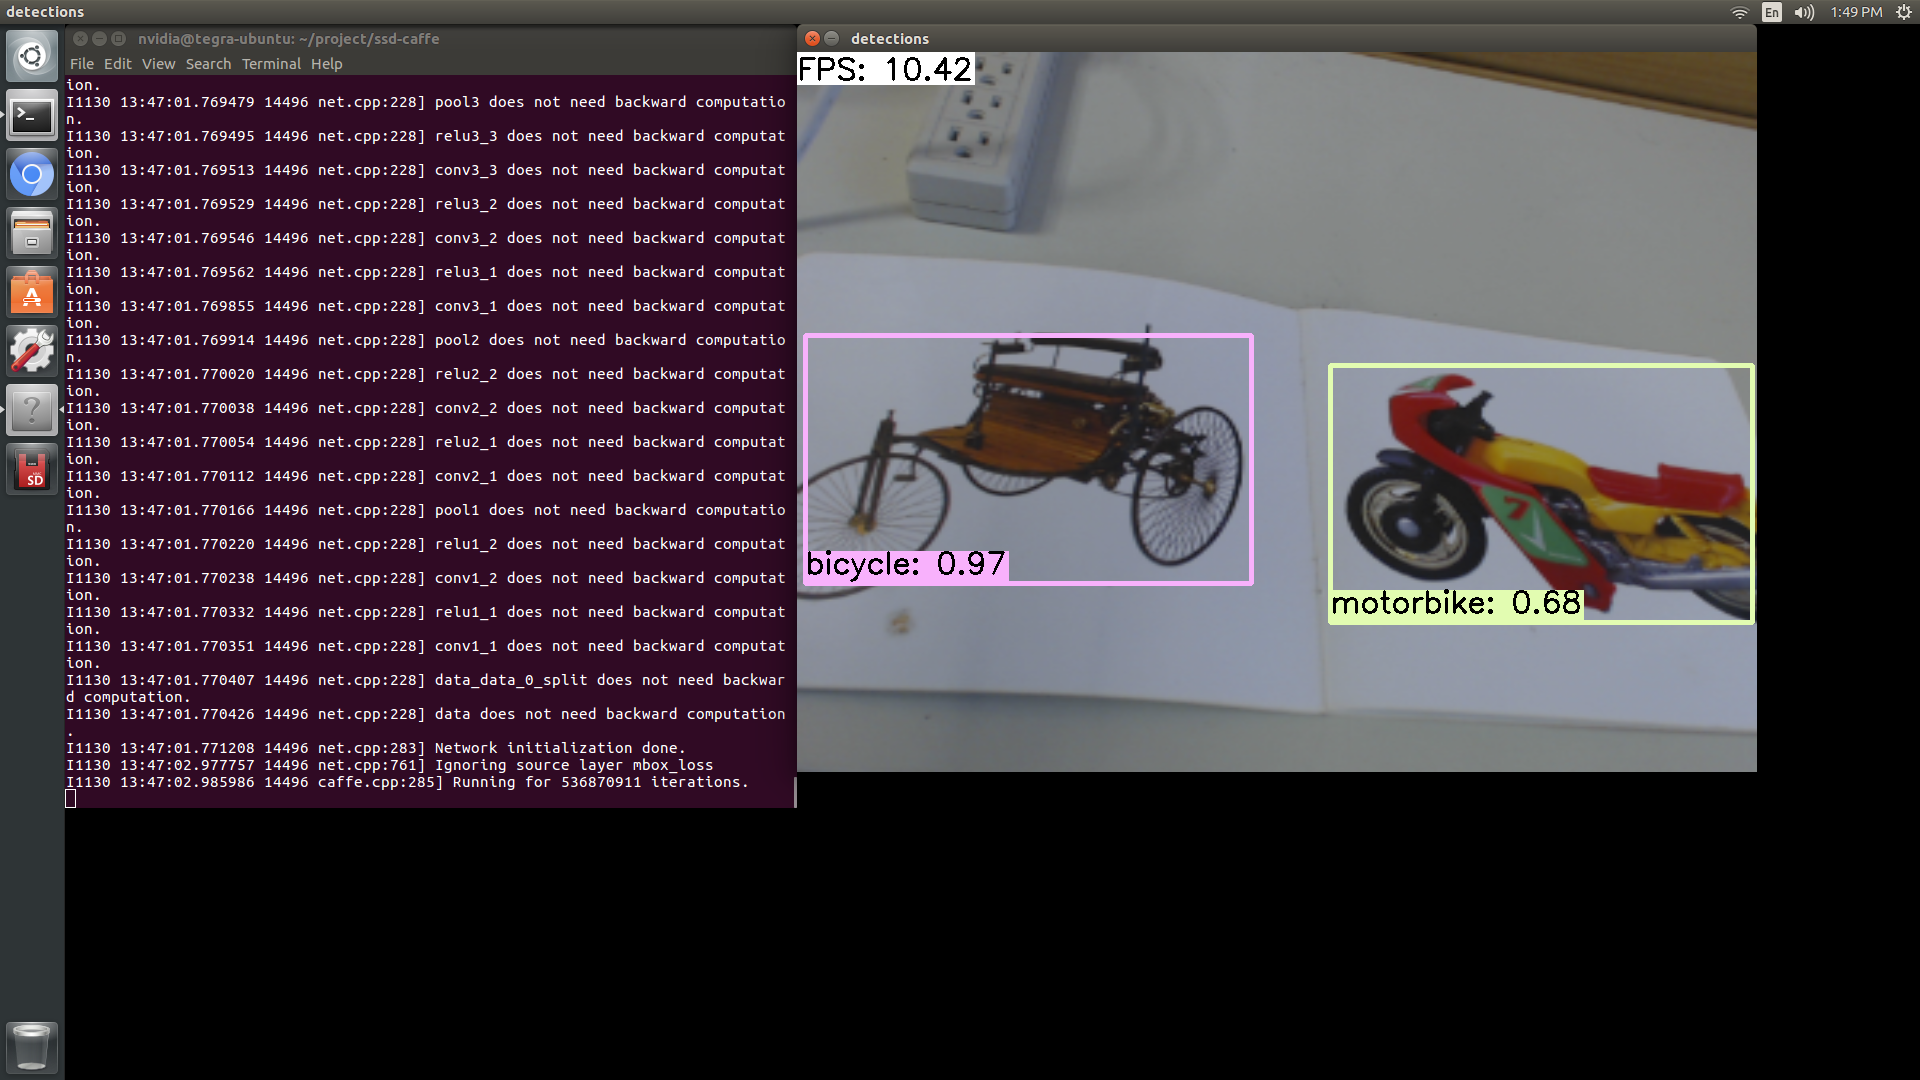
To test the SSD model with a USB webcam, you’ll have to modify 1 line of code in
./examples/ssd/ssd_pascal_webcam.py. More specifically, on line #76 you’d setwebcam_id = 1(corresponding to /dev/video1). Then execute the following cmomand. The displayed frame rate was around 10 fps on my Jetson TX2.$ PYTHONPATH=/home/nvidia/project/ssd-caffe/python python ./examples/ssd/ssd_pascal_webcam.py