Setting Up a NGINX + Flask Server on GCP
I have always been wanting to set up a dashboard on the cloud which I could use to monitor IoT products and devices on the field. I was aware that AWS, Azure and GCP all have offerings of IoT Core services. But I think they are overkill for basic device monitoring. Those solutions offered by the cloud vendors are generally too complicated for basic device monitoring and too expensive.
As an alternative, I’d like to look into possibilities of setting up an HTTP server (dashboard) with a free (or very-low-cost) compute instance on the cloud. I made such an attempt on Google Cloud first. This post documents the key steps I applied to set up a NGINX + Flask server using a entry-level Compute Engine on GCP.
Prerequisite
-
Sign up for an account on GCP: https://cloud.google.com/free/. (You get a credit of USD 300 when signing up for the first time.)
-
In addition to accessing GCP console with a web browser, I also installed Google Cloud SDK on my local PC for easy access from the command line. I used a Ubuntu Linux PC for that. (You could actually use whatever PC/Mac platform of your own preference.)
Step #1 - Create the Compute Engine on GCP
Reference (in Chinese): https://www.yannyann.com/2018/02/wp-ssl-ubuntu-lamp-nginx-varnish-redis-2/
Key steps:
-
Create a new project, e.g. “nginx-test” with “nginx-test-282303” as the project id. Make sure the newly created project is active on the GCP console.
- Under “Compute Engine”, do “Create a new VM instance”.
- I left the “Name” as “instance-1”.
- In order to lower network latency, I chose “asia-east1 (Taiwan)” as the “Region” and “asia-east1-b” as the “Zone”.
- In order to lower the cost, I chose “N1” “Series” and “f1-micro (1vCPU, 614 MB memory)” “Machine Type”. This resulted in “$5.00 monthly estimate”. (You might be able to use the free tier f1-micro instance if you choose the Compute Engine from a US Region.)
- As to “Boot disk”, I chose “Ubuntu” and “Ubuntu 18.04 LTS”.
- I checked both boxes of “Allow HTTP traffic” and “Allow HTTP traffic”.
- Under “Management, security, disks, networking, sole tenancy” -> “networking”, I set “Hostname” as “instance-1.nginx-test”.
- I hit the “Create” button, and waited for the Compute Engine to be created.
- I also did the following in order to set a fixed IP address for my “instance-1”.
- I selected “instance-1” from “Compute Engine” -> “VM instances”.
- Go to “Networking”/”VPC Network” -> “External IP addresses”.
- Promote the ephemeral external IP address of “instance-1” to “Static”.
Step #2 - Set up Google Cloud SDK locally and connect to the Compute Engine (“instance-1”)
Reference: Quickstart for Debian and Ubuntu
-
I followed the Quickstart document and installed gcloud on my local Ubuntu PC.
-
During
gcloud init, I chose project “nginx-test-282303” and compute zone “asia-east1-b”. -
When done, I was able to easily ssh from my local PC to my Compute Engine with:
 ### On my local PC
 $ gcloud compute ssh instance-1
Step #3 - Set up NGINX on the Compute Engine (“instance-1”)
Reference: How To Install Nginx on Ubuntu 18.04
-
Install NGINX on the Compute Engine. Note the following should be executed on the Compute Engine (ssh’ed on “instance-1”).
### On the CGP Compute Engine instance $ sudo apt update $ sudo apt install nginx -
By default, network firewall is not enabled on the Compute Engine. It could be verified as below. As a result, I did not need to alter firewall settings on the Compute Engine.
$ sudo ufw status Status: inactive -
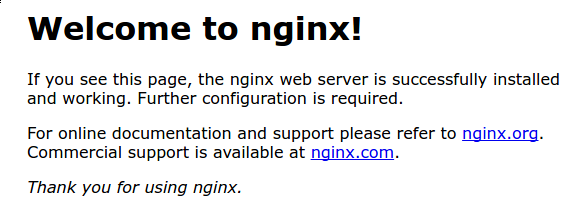
At this point, the NGINX server should have been running and could accept connections. Find out the “external IP” address of the Compute Engine (“instance-1” on GCP console, e.g. “34.80.xxx.yyy”. Then open the default web page with a web browser: “http://34.80.xxx.yyy”. The following content is expected.
-
The above static web page could be customized by modifying files in the “/var/www/html” directory.
Step #4 - Set up Flask
Reference: How To Serve Flask Applications with uWSGI and Nginx on Ubuntu 18.04
-
Install Flask.
$ sudo apt update $ sudo apt install python3-pip python3-dev build-essential \ libssl-dev libffi-dev python3-setuptools $ sudo python3 -m pip install -U pip wheel $ sudo python3 -m pip install flask -
Create the Flask app.
 $ mkdir ${HOME}/flask
 $ nano $HOME/flask/hello_world.py
And put the following content into “$HOME/flask/hello_world.py”.
from flask import Flask, jsonify app = Flask(__name__) @app.route('/api/hello') @app.route('/api/helloworld') def hello_world(): return 'Hello, World!' @app.route('/api/ver') def api_ver(): version = { 'version': '0.1' } return jsonify(version) -
Add the proxy (forwarding) rule for Flask in NGINX’ settings. More specifically, edit “/etc/nginx/sites-available/default”, e.g.
sudo nano /etc/nginx/sites-available/default. Add the following lines.location / { # First attempt to serve request as file, then # as directory, then fall back to displaying a 404. try_files $uri $uri/ =404; } + location ^~ /api { + proxy_pass http://127.0.0.1:5000; + proxy_set_header Host $host; # preserve HTTP header for proxy requests + }Restart NGINX with the new setting.
$ sudo nginx -s reload -
Create a script and run the Flask app.
Create a “run_flask.sh” script:
$ nano ${HOME}/flask/run_flask.shwith the following content:
FLASK_APP=${HOME}/flask/hello_world.py flask runThen run the script:
$ /bin/bash ${HOME}/flask/run_flask.sh -
Open the web page with a web browser again: “http://34.80.xxx.yyy/api/hello”. A “Hello, World!” should appear on the browser. Next, also test: “http://34.80.xxx.yyy/api/ver”. The output should read:
{"version":"0.1"}.
Step #5 - Automatically run Flask as a service
Reference: Running a Flask Application as a Service with Systemd
-
Create a “flask” service with systemd.
First create the file “/etc/systemd/system/flask.service”:
$ sudo nano /etc/systemd/system/flask.servicewith the following content: (Remember to replace “jkjung” with your own account name.)
[Unit] Description=Flask Service After=network.target [Service] User=jkjung WorkingDirectory=/home/jkjung/flask ExecStart=/bin/bash /home/jkjung/flask/run_flask.sh Restart=always [Install] WantedBy=multi-user.target -
Reload and start the service.
$ sudo systemctl daemon-reload $ sudo systemctl start flask -
If everything goes as planned, the “/api/hello” and “/api/ver” pages should display on the browser the content generated by Flask.
Recap
This post demonstrated how to set up NGINX + Flask on a low-cost Compute Engine on GCP. With this set-up, we could have a easy-to-program HTTP server on the cloud which handles both static and dynamic web pages.