How I Built My Own Deep Learning PC
I built my own deep learning PC for DNN/CNN training about 1 year ago. Although the information is not up-to-date now. I think the experience is still worth sharing.
When I set out to build my own deep learning PC, I mainly referenced the following web pages:
- “Deep Learning Machine Construction” by DT42
- NVIDIA DIGITS DEVBOX Documentation
- jcjohnson/cnn-benchmarks, which helped me pick the right NVIDIA GPU to use
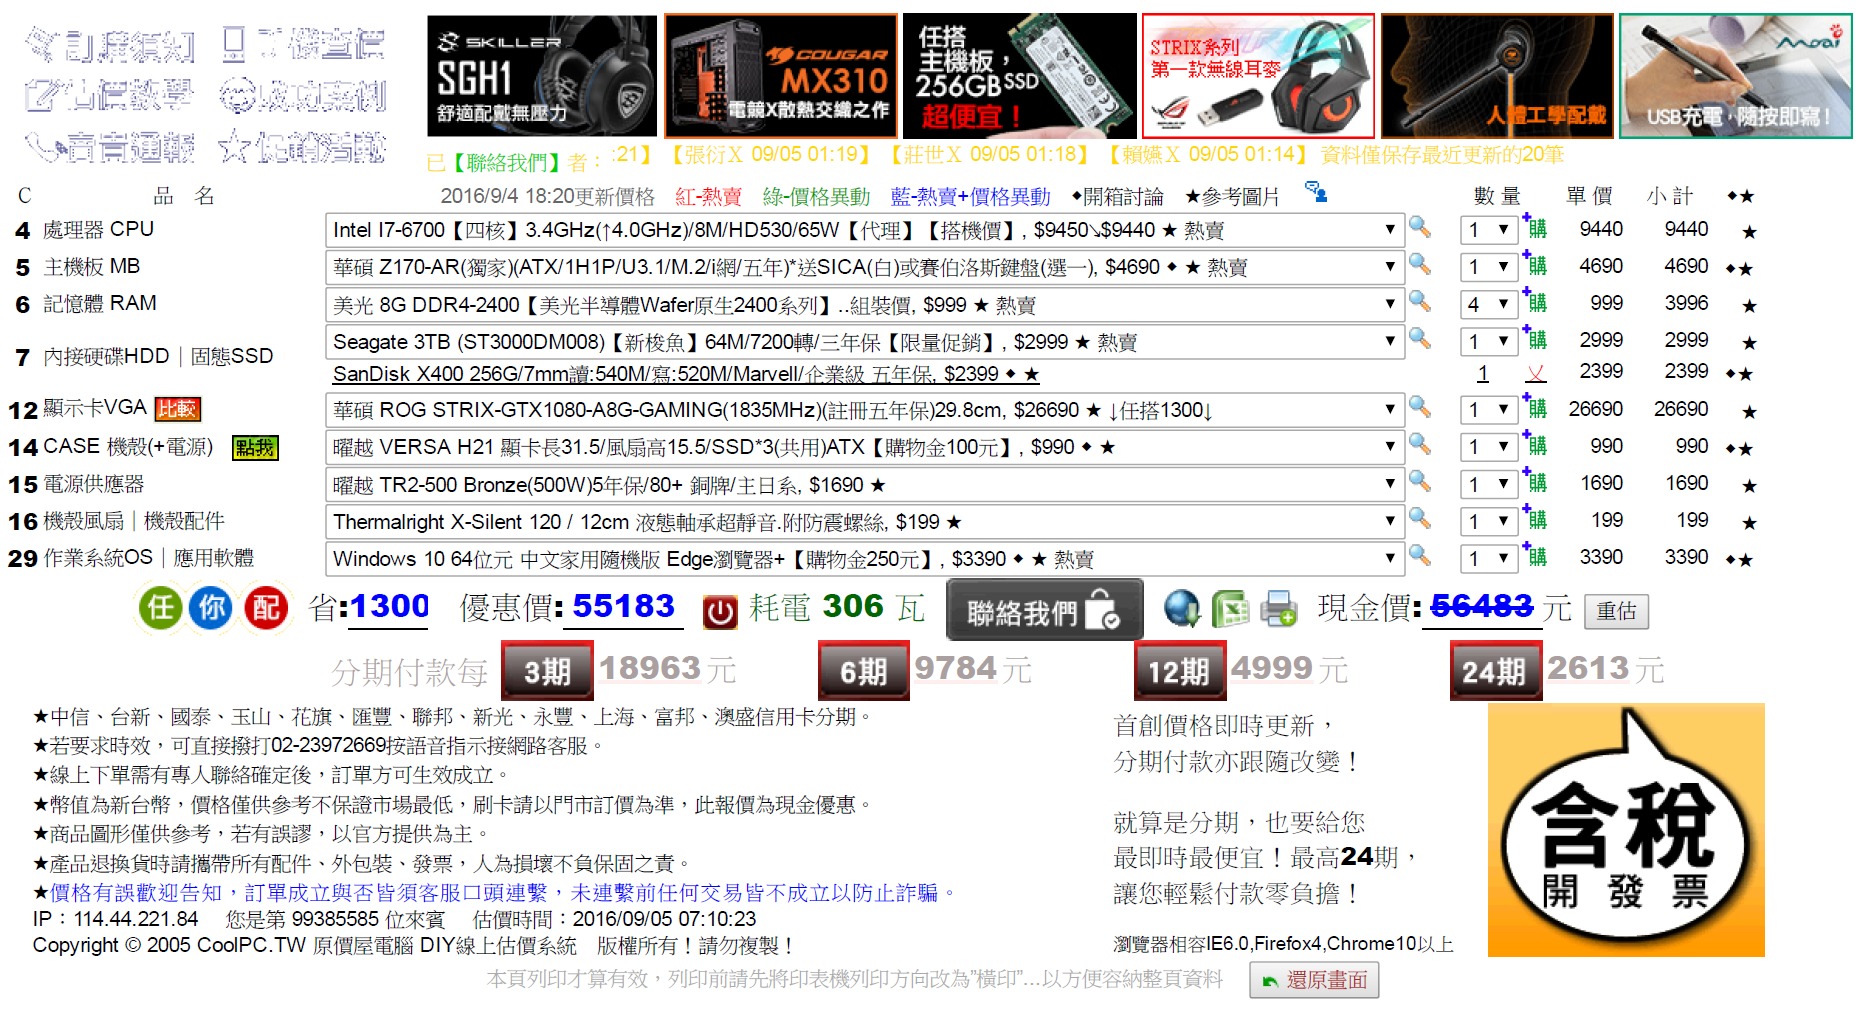
After research, I went to CoolPC (原價屋) to acquire the desktop PC. I first decided that I’d want a GeForce GTX-1080 with 8GB of GPU memory. Then I picked a decent Intel i7 CPU and motherboard to match the graphics card. I wasn’t thinking about expanding the PC with more than 1 GPU, so I picked a motherboard with only 1 PCIe x16 slot and didn’t consider much buffer on power supply and case (internal space). Finally I picked an 256GB SSD for Linux booting and another 3TB regular HDD for data storage. Note that later on I found I needed to purcahse 1 additional large SSD drive since training a DNN/CNN with a large dataset like ImageNet images (>130GB) would require constant and frequent access of the HDD/SSD, lasting 24HR for several days. The regular HDD is just not cut for that kind of task!
Here’s the exact breakdown of the desktop PC I purchased (without the additional SSD). And it cost me NT$ 55,183, or roughly USD 1,800.
As to software installation, I did the following.
- I partitioned tha 256GB SSD drive into half/half. On one of the partitions I kept the Windows 10 which came bundled with the desktop PC. And I installed Ubuntu 14.04 on the other partition.
- I partitioned the 3TB HDD into 3 parts: EFI, swap and Linux data (/home).
- I created different accounts under Linux for different purposes: jkjung, caffe, digits, etc. For each account, I was able to set it up to use different version of the libraries (CUDA, python packages, OpenCV, Caffe/NvCaffe, etc.)
- I don’t use
apt-getto install NVIDIA graphics driver. Instead I downloaded and installed the latest version from NVIDIA web site: http://www.nvidia.com/object/unix.html - I also downloaded and installed the latest version of CUDA Toolkit and cuDNN from NVIDIA web sites.
- Finally for NVIDIA DIGITS, I again did not do
apt-get installbut instead installed it from source by following its GitHub document. This way I had better control over when digits-devserver got started and where all data/configuration/files got written to. (Recently I found running DIGITS through Docker containers might be a even better solution.)
I’ve been using this PC for DNN/CNN training (and also for BitCoin mining occasionally) for 1 year now, and I’m pretty happy with the hardware as well as how I’ve set it up software-wise.